How to Install Cold Air Intake - A Clear Guide for Users
If you have very less idea about custom car modifications, you know very well that cars are just not manufactured with that much performance, instead modified with aftermarket assemblies such as the excellent cold air intakes. In this article, we are going to talk about how to install cold air intake and its maintenance.
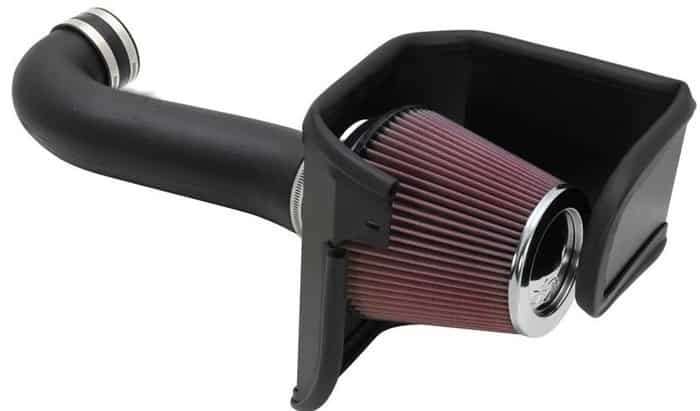
A cold air intake is simply an aftermarket assembly kit engineered to move out the air filter outside and feed cooler air into the engine compartment. By doing so, it gives a significant rise to the horsepower, gas mileage, torque, and improved throttle response. This results in a surge in the overall engine efficiency and performance.
Now the chances are that you may be considering the best cold air intake installation into your vehicle to give it a performance boost. If so, then congratulations because you have come to the right place. Here we have a detailed walkthrough on
· How to install a cool air-intake
· What precautions you should take to install it properly
· How you can ensure longer service life of the cold air intake filter
So, without further delay, let us jump straight how to install an intake:
How to Install Cold Air Intake
Cold Air Intake Installation is, undoubtedly, the second most important thing after choosing the best one for your vehicle. An improper installation can cause the best cold air intakes to malfunction which can lead to very unpleasant experiences such as
· Poor engine efficiency
· Overheating of engine
· Poor throttle response
· Damage of engine-parts
Therefore, it's crucial to install a cold air intake without any mistakes. However, if you are new to car parts, it is advised to seek help from someone with adequate knowledge. However, if you're considering doing it yourself, then no worries because we are here to help.
First, you will need a few things such as-
- Your vehicle’s manufacture’s instruction or car manual
- Necessary hand-tools like Torx Bits, Flat Screwdriver, Wrench Socket etc.
- Metal cleaners
Now, the entire installation process can be divided into three sections –
A. Extracting the old stock air intake
B. Installing the new cold air intake
C. Test-driving
Let’s break them down into some easy steps so that it is more comfortable for you to follow
A. Extracting the old stock air intake
To install the new aftermarket cold air intake, first, you have to extract the old or existing one to make space. Follow these steps to do it adequately –
Step#1. Look for the stock air intake
It's quite easy to find and locate the stock air intake. Look for a large plastic, rubber, or metal tube coming out of the engine into a large plastic box. If your old one itself is a cold air intake, you may have to climb underneath the car as the filter is usually shifted to the bottom.
Step#2. Remove additional mounts
To do this, first, see if there's any air sensor attached to the existing air-filter. Check the car manual to be sure. If found, make sure that the car battery is unplugged and then remove the sensor's circuitry carefully.The next things you have to look for are the mounts. They can be of either plastic or metal, attaching the stock intake to the car engine and air filter. Use hand tools to delicately detach the mountings and store them in plain sight as they will be required later.
You may also find some clamps instead of mountings. Use a screwdriver to loosen them and similarly store them.
Step#3. Extract the old stock intake
With all the mounts removed, carefully extract the old stock intake from near the engine compartment as store it safely as it may have some aftermarket value or if you may want to use it later if not damaged.
B. Installing the new cold air intake
Installing the new cold air intake is like the reverse process of extracting the old one. Follow these steps for proper installation –
Step#1. Install the new cold air intake
First, check the manufacturer's guide to know which part goes where of the new cold air intake. Attach the intake tube to the engine compartment. Then climb under your vehicle to attach the new air-filter and attach it to the intake tube.
Step#2. Attach the mounts
Check your car manual to find out which mount is secured first and where to put it properly. Then, using hand tools, carefully remount all the plastic or metal mounts and clamps to attach the new cold air intake in its place. Double-check if all of them are secured correctly.
Then carefully, reattach the air sensors with their circuitry in the proper order. Do this step with your utmost sincerity unless you want some nasty sparks which are quite dangerous
Step#3. Double-check
Pick up the car manual and carefully double-check if all the mounts, sensors, circuitry, and the new air intake are correctly installed. Don't ignore even the smallest of abnormalities as sometimes, your life depends on it.
C. Test-driving
After giving the installation, a double-check, and being confident that everything is appropriately attached, plug in the battery and take your car on a test-drive. Observe every major and minor performance details as t's very important to evaluate all of that has been done so far. If you find abnormalities like a lousy engine noise or reduced gas mileage or quick heating of engine, then something might have gone wrong, and in that case, you have to review the whole process to find out the flaw which is causing the anomaly.
Follow these above steps with great attention, and hopefully, you have learnt how to install k&n cold air intake
Precautions need to install cold air intake properly
It's vital to keep in mind the precautions you should take to ensure the proper installation of any vehicle part. And the cold air intake is no exception. Here are the precautions you should take and know how to install a cold air intake:
1. Knowing your vehicle specification
Not all vehicles have identical specs. Some have different engine types or different structures and working conditions than the others. So, you cannot just buy an everyday car's cold air intake and put it in a monster truck. It's quite simple to understand.Hence, while buying a cold air intake, check if it matches the specifications of your specific vehicle and cost of air intake. Otherwise, it will just not work; instead, cause problematic issues for your vehicle.
Therefore, check your car manual, again and again, to have a detailed knowledge of the type of your vehicle and also the type of your engine.
2. Stable your car properly
Stable your car correctly before installing the new cold air intakes. You'll be required to climb down the car if necessary. Hence, park your car in a way so that it doesn't move on its own and has enough space underneath for you to slide under.
3. Let your vehicle cool down
Don't just start installing just after a drive as your car-engine would be so hot to touch. Hence, unless you don't want to avoid getting a nasty burn, do not touch the engine just after driving, let alone tinkering with it. It's never a good idea. Instead, let your vehicle cool down, and meanwhile, you can go through the car manual.
4. Unplug your battery before installation
Always unplug your battery before doing any kind of tinkering. Sometimes, your air-filter may contain air-sensors which have to remove with their circuitry. Removing them with the battery plugged it may cause short circuits that can lead to sparks, which is very dangerous. You should never want sparks near the engine's fuel supply line, which may lead to catastrophic accidents.
How you can ensure longer service life of the cold air intake
There's a saying that if you take care of things, they last, and a cold air intake is no exception.
There are several ways you can follow to ensure a long and hazard free service life of your new cold air intakes such as –
Just like a matchstick which won't be able to take the weight of a substantial brick, a cold air intake cannot perform under different specs that it was not built to deal with for a long time. Hence soon, it will get jammed or will be subject to malfunction. So, first, choose the right cold air intake that matches with your vehicle specifications adequately.
2. Keep the air filter clean
Although modern cold air intakes can keep the air filter clean for decades, it's a wise decision to check and keep the air-filter clean after some definite intervals.
3. Shield your cold air intake from water
The cold air intake sits below the car, so it's quite easy for rainwater or regular water to get into it, which is not a good thing. Shield your cold air intakes using hydro-locks or similar devices to restrict water from getting inside.
4. Prevent metal friction
If your tube is made of rubber or steel and is in contact with other metals like aluminum, it may wear a hole due to the continuous friction that occurs between them. Avoid this type of friction by placing the intake tube correctly.
Conclusion
Cold air intakes are excellent additions to boost your car performance only as long as you install them correctly and adequately maintain them. Therefore, pay close attention and know how to install cold air intake. You should maintain them properly as it's never wise to compromise with the betterment and safety of your beloved automobile.